

Table of Contents
ToggleIntroduction: How to Install Computer Peripherals
In this article, we are going to understand how to install Computer peripherals step-by-step. Computer peripherals are additional devices or hardware components that extend the functionality of a computer beyond its core components like the central processing unit (CPU) and memory. These peripherals play a crucial role in enhancing the overall computing experience by providing users with expanded capabilities and the ability to interact with the digital world in various ways.
Definition of Computer Peripherals: Computer peripherals encompass a wide range of devices, including but not limited to printers, scanners, webcams, external hard drives, keyboards, mice, and speakers. Each of these peripherals serves a specific purpose, contributing to the overall versatility and utility of the computer.
Enhancing Computer Functionality: The importance of computer peripherals lies in their capacity to extend the capabilities of a computer system. For instance, a printer allows users to transform digital documents into tangible hard copies, while a webcam facilitates video communication and online collaboration. Scanners enable the conversion of physical documents or images into digital formats, and external hard drives provide additional storage space for large files.
These peripherals not only expand the range of tasks a computer can perform but also enhance efficiency and convenience in various domains, such as work, education, and entertainment. The ability to customize a computer setup with peripherals tailored to specific needs empowers users to create a personalized and optimized computing environment.
In this article, we will guide you through the step-by-step process of installing computer peripherals, ensuring that you can harness their full potential seamlessly. From gathering necessary tools to testing and troubleshooting, we’ll cover each aspect with easy-to-understand explanations, making the installation process accessible to users of all levels. Let’s embark on this journey to enhance your computer setup by integrating valuable peripherals effectively.
Preparation:
Before diving into the installation process, especially when considering how to install computer peripherals, it’s crucial to lay the groundwork for a successful experience. Adequate preparation involves familiarizing yourself with the peripherals through user manuals and ensuring compatibility with your computer system.
Reading User Manuals: One of the initial and often overlooked steps in preparing to install computer peripherals is reading the user manuals that accompany each device. These manuals are comprehensive guides provided by manufacturers, offering valuable insights into the specific features, functionalities, and installation procedures for the peripheral.
The importance of reading these manuals cannot be overstated. They provide detailed information on the correct handling, setup, and maintenance of the peripheral. Understanding the instructions beforehand helps avoid common pitfalls during installation, ensuring a smoother and error-free process. Each peripheral may have unique requirements, and the manual acts as a roadmap, guiding users through the nuances of setting up the device correctly.
Checking System Requirements: Another critical aspect of preparation is checking the system requirements of the peripherals before making a purchase. System requirements outline the minimum specifications a computer must have to support and operate the peripheral effectively.
These requirements typically include details such as the necessary operating system, available USB ports, minimum RAM, and processor speed. By verifying your computer’s compatibility with the peripheral’s specifications, you can prevent potential issues like incompatibility, performance issues, or even hardware damage.
Before adding a new peripheral to your setup, take note of your computer’s specifications and compare them to the requirements outlined in the product documentation. This proactive approach ensures that the peripheral you choose not only meets your needs but also integrates seamlessly with your existing hardware and software environment.
In the upcoming sections of this guide, we will delve into the practical steps of setting up your peripherals. By prioritizing these preparatory measures, you pave the way for a trouble-free installation process and maximize the benefits of your newly acquired computer peripherals.
Gathering Necessary Tools:
Before embarking on the installation journey, especially when considering how to install computer peripherals, assembling the right set of tools is paramount to ensure a smooth and efficient process. Here’s a list of common tools required, along with an explanation of their roles and when they are needed during the installation process:
- Screwdriver:
- Role: A screwdriver is a versatile tool needed for securing various hardware components in place. It’s commonly used to fasten screws that hold peripherals together or attach them to the computer.
- When Needed: You’ll use a screwdriver when securing components that need to be physically attached, such as mounting a new hard drive or securing the base of a monitor stand.
- Cables:
- Role: Cables serve as the physical connections between the peripheral and the computer. They transmit data, power, and sometimes audio-visual signals.
- When Needed: Different peripherals require different cables. USB cables are commonly used for various devices like printers and external drives, HDMI or DisplayPort cables for monitors, and power cables for many peripherals. Have the right cables on hand before starting the installation.
- Software CDs or USBs:
- Role: Software CDs or USBs often contain essential drivers and software required for the peripheral to function optimally. These drivers facilitate communication between the peripheral and the computer’s operating system.
- When Needed: Insert the provided software CD or USB and install the necessary drivers before physically connecting the peripheral. This ensures that the computer recognizes and utilizes the peripheral correctly.
- Documentation:
- Role: User manuals and setup guides provide detailed instructions for installing and configuring the peripheral. They offer valuable insights into specific setup requirements and troubleshooting tips.
- When Needed: Refer to the documentation throughout the installation process. It helps in understanding the correct sequence of steps, addressing potential issues, and maximizing the functionality of the peripheral.
- Anti-static Wrist Strap (Optional):
- Role: An anti-static wrist strap helps discharge any static electricity from your body, preventing accidental damage to sensitive electronic components.
- When Needed: While not always necessary, using an anti-static wrist strap is recommended when handling components like RAM or internal hard drives, especially in dry environments where static electricity is more prevalent.
By gathering these tools before starting the installation, you set the stage for a hassle-free and secure process. Each tool plays a crucial role in ensuring that your peripherals are correctly and safely integrated into your computer setup. In the subsequent sections, we’ll explore how to use these tools effectively during the installation process.
Creating a Workspace:
A well-organized workspace is the foundation for a successful and safe peripheral installation. Here’s why maintaining a clean and organized environment is crucial, along with a safety tip regarding the computer’s status during the setup:
Importance of a Clean and Organized Workspace: A clean and organized workspace is not just about aesthetics; it significantly contributes to the efficiency and safety of the installation process. A clutter-free area provides ample space for spreading out tools, cables, and peripherals, reducing the likelihood of accidental damage or confusion during the setup.
Key Points:
- Efficiency: An organized workspace allows you to quickly locate tools, cables, and peripherals, streamlining the installation process. This efficiency ensures that you spend less time troubleshooting and more time enjoying your newly integrated devices.
- Preventing Damage: A tidy workspace minimizes the risk of tripping over cables, knocking over tools, or inadvertently damaging delicate peripherals. It creates a controlled environment where you can focus on the installation without unnecessary distractions.
- Visual Clarity: A clean workspace provides visual clarity, making it easier to follow instructions from user manuals or setup guides. This visual clarity is particularly important when dealing with small components or intricate connections.
Safety Tip: Keep the Computer Off During Setup: Ensuring safety during the installation process is paramount. While it might be tempting to leave the computer on for quick testing, it’s advisable to keep it turned off during the setup.
Key Points:
- Preventing Electrical Hazards: Turning off the computer eliminates the risk of electrical shock when connecting or disconnecting peripherals. It ensures that you can handle cables and components without the potential dangers associated with live electrical currents.
- Avoiding Software Conflicts: Keeping the computer off during setup prevents potential software conflicts that may arise when installing new hardware. It provides a clean slate for installing drivers and ensures a smoother integration process.
- Focus on Hardware: With the computer powered off, you can concentrate on the physical aspects of the installation, such as connecting cables, securing peripherals, and following step-by-step instructions without the distraction of an active operating system.
By emphasizing the importance of a clean and organized workspace and stressing the need to keep the computer off during the setup, you create a foundation for a systematic and safe installation process. In the subsequent sections, we’ll delve into the step-by-step actions required to connect and integrate specific computer peripherals effectively.
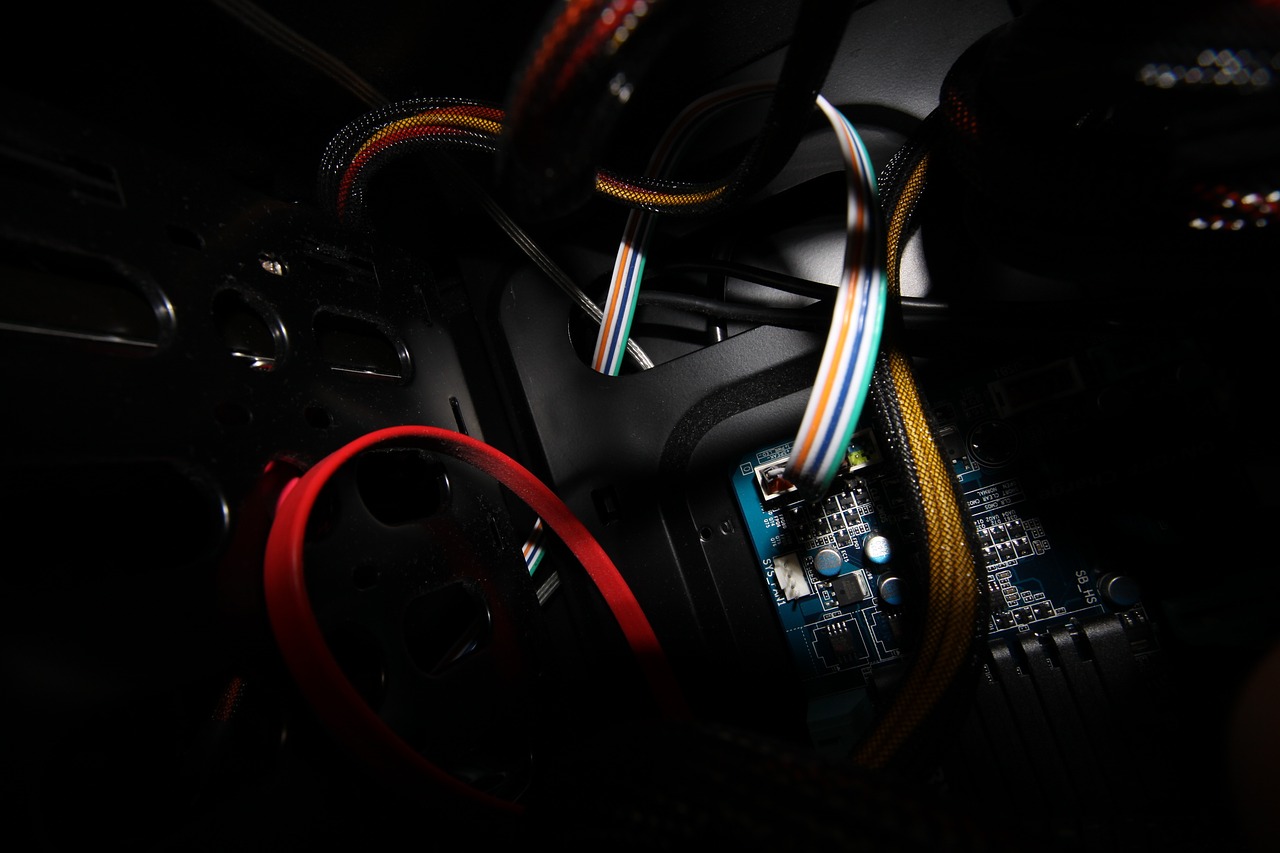
Connecting Physical Peripherals:
Now that your workspace is organized and your tools are ready, let’s dive into the step-by-step process of physically connecting peripherals to your computer. We’ll use common examples like USB, HDMI, and power cables, and stress the importance of matching cable types to corresponding ports for a seamless setup.
Step-by-Step Instructions:
- Identify Ports on Peripherals:
- Examine the peripheral devices (e.g., printers, scanners, monitors) and locate the various ports available. Common ports include USB, HDMI, DisplayPort, and power ports.
- Turn Off the Computer:
- Ensure the computer is powered off to prevent electrical hazards and software conflicts during the physical connection process.
- Identify Computer Ports:
- Locate the corresponding ports on your computer for each peripheral. Common ports are usually found on the back or sides and may include USB, HDMI, power, and audio ports.
- Select the Correct Cables:
- Choose the appropriate cables for each peripheral based on the identified ports. USB cables are often used for devices like printers and external drives, HDMI or DisplayPort cables for monitors, and power cables for various peripherals.
- Connect Power Cables:
- Start by connecting power cables to each peripheral and plug them into a power source. Ensure that the power source matches the requirements outlined in the user manual.
- Connect Data Cables:
- Use the selected data cables to connect peripherals to the corresponding ports on the computer. USB cables should be inserted into USB ports, HDMI cables into HDMI ports, and so on.
- Secure Cable Connections:
- Confirm that all cable connections are securely and correctly seated. A snug fit prevents intermittent connectivity issues and ensures stable communication between the computer and peripherals.
- Power On Peripherals:
- Once all physical connections are made, power on the peripherals. Follow any specific startup procedures outlined in the user manuals.
- Power On the Computer:
- After ensuring that all peripherals are powered on and stable, turn on the computer. This allows the operating system to recognize the newly connected devices.
- Check for Recognition:
- Verify that the computer recognizes the peripherals by checking the device manager or system settings. If needed, install any additional drivers or software from the provided CDs or USBs.
Emphasizing Matching Cable Types: It’s crucial to emphasize the significance of matching cable types to corresponding ports. Mismatched cables can lead to connectivity issues, data transfer problems, or, in some cases, hardware damage. Always refer to the user manuals for both the computer and peripherals to ensure compatibility and proper cable selection.
By following these step-by-step instructions and emphasizing the importance of matching cables to ports, you set the stage for a successful physical connection of computer peripherals. In the next sections, we’ll delve into the software aspects of the installation process to optimize the functionality of your newly connected devices.
Installing Software Drivers:
As you’ve successfully connected your peripherals physically, the next crucial step is installing the necessary software drivers. Understanding the importance of drivers and how to install them correctly is key to ensuring optimal functionality. Here’s a detailed guide:
Importance of Installing Drivers: Drivers act as the communication bridge between your computer’s operating system and the peripherals. They enable the system to recognize and utilize the specific features of each device. Without proper drivers, peripherals may not function correctly, leading to performance issues or, in some cases, non-operability.
Key Points:
- Enhanced Performance: Drivers optimize the interaction between hardware and software, ensuring that peripherals operate at their best capacity. This can lead to improved speed, responsiveness, and overall performance.
- Feature Utilization: Many peripherals have advanced features that require specific drivers for activation. Installing the correct drivers unlocks these features, allowing you to take full advantage of your device’s capabilities.
- Compatibility: Drivers ensure compatibility between the peripheral and the operating system. Regular updates to drivers address bugs, enhance compatibility with the latest software, and improve security.
Guidance on Finding and Installing Drivers:
- Check the Included CD or USB:
- Many peripherals come with a CD or USB containing the necessary drivers. Insert the provided CD or USB into your computer and follow the on-screen instructions to install the drivers.
- Visit the Manufacturer’s Website:
- If your peripheral didn’t come with a CD or USB, visit the official website of the peripheral’s manufacturer. Look for a “Support” or “Downloads” section where you can find the latest drivers for your specific model.
- Identify the Model Number:
- Make a note of the model number or name of your peripheral. This information is usually found on the peripheral itself or in the user manual.
- Download Drivers:
- On the manufacturer’s website, locate the drivers section and enter your peripheral’s model number. Ensure you download the most recent drivers that are compatible with your operating system.
- Install Drivers:
- Once downloaded, run the driver installation file. Follow the instructions displayed on the screen to finalize the installation. This may involve accepting terms and conditions, choosing installation options, and restarting your computer.
- Verify Installation:
- After installation, verify that the drivers are successfully installed. Check the device manager or system settings to ensure that the peripheral is recognized without any issues.
Troubleshooting Tips:
- Check for Updates:
- Regularly visit the manufacturer’s website to check for updates to your drivers. Updated drivers may address performance issues or provide new features.
- Compatibility Mode:
- If you encounter compatibility issues with newer drivers, try running the installation file in compatibility mode. Access the file by right-clicking, choose “Properties,” and then go to the “Compatibility” tab.
- Reinstall Drivers:
- If you experience problems with peripheral functionality, consider uninstalling and reinstalling the drivers. Address problems linked to corrupted installations with this approach.
- Contact Support:
- If troubleshooting on your own proves challenging, don’t hesitate to contact the manufacturer’s customer support for assistance. Receive personalized advice tailored to your unique situation from them.
By understanding the necessity of installing drivers, following the steps to find and install them, and utilizing troubleshooting tips, you ensure that your peripherals operate at their best potential. In the subsequent sections, we’ll explore additional configuration steps to optimize your computer setup further.
Configuration and Calibration:
Now that you’ve successfully installed the necessary drivers, the next step is to configure settings for optimal performance. This involves adjusting specific parameters to match your preferences and ensuring that peripherals like monitors, printers, and scanners are calibrated correctly. Let’s explore the configuration process:
Configuring Settings:
- Monitor Configuration (e.g., Screen Resolution):
- For a new monitor, adjusting the screen resolution is crucial for a clear and crisp display. Right-click on your desktop, select “Display Settings,” and navigate to the “Resolution” option. Choose the recommended resolution for your monitor to ensure optimal visual quality.
- Keyboard and Mouse Settings:
- Customize keyboard and mouse settings based on personal preferences. Access the control panel or settings menu on your computer to adjust parameters like keyboard repeat rate, pointer speed, and scrolling options.
- Audio Peripheral Configuration:
- If you’ve connected audio peripherals like speakers or headphones, configure audio settings to ensure the correct playback device is selected. Access the sound settings in the control panel or system preferences and choose the desired audio output.
- Printer Settings:
- Adjust print settings based on your requirements. Access the printer properties or settings through the control panel or system preferences. Customize parameters such as paper size, print quality, and orientation to match your printing needs.
Peripheral Calibration:
- Monitor Calibration:
- Calibrating your monitor ensures accurate color reproduction and brightness levels. Use built-in calibration tools on your computer or invest in a dedicated monitor calibration device for more precise results. Follow the on-screen instructions to adjust settings like gamma, color temperature, and brightness.
- Printer Calibration:
- Calibrating a printer is crucial for obtaining accurate and consistent color output. Some printers come with built-in calibration features, while others may require third-party calibration tools. Follow the printer manual or use software provided by the manufacturer to calibrate color profiles and ensure print accuracy.
- Scanner Calibration:
- Scanners benefit from periodic calibration to maintain accurate color reproduction. Check the scanner’s user manual for calibration instructions or use software provided by the manufacturer. Calibration typically involves scanning a calibration target and adjusting settings to achieve accurate color representation.
- Webcam Configuration:
- Adjust webcam settings for video conferencing or recording. Access the webcam settings through the control panel or camera app on your computer. Configure parameters such as resolution, frame rate, and exposure to enhance video quality.
Additional Tips:
- Save Custom Configurations:
- After configuring settings and calibrating peripherals, consider saving custom profiles. This ensures that your preferences are easily retrievable in case of system updates or changes.
- Regular Checkups:
- Periodically revisit your configurations and calibrations, especially after system updates or changes to your computing environment. This helps maintain optimal performance and color accuracy over time.
By following these steps for configuration and calibration, you’ll fine-tune your peripherals to meet your specific needs. In the subsequent sections, we’ll explore maintenance tips to ensure the longevity and consistent performance of your installed peripherals.
Testing and Troubleshooting:
Now that your peripherals are physically connected, drivers are installed, and configurations are set, it’s time to test their functionality. Immediate testing helps identify any issues early on. Additionally, having a troubleshooting guide at hand ensures that you can address and resolve common problems efficiently.
Encouraging Immediate Testing:
- Power On Peripherals:
- Ensure all peripherals are powered on before starting the testing phase. This includes monitors, printers, scanners, webcams, and any other connected devices.
- Test Basic Functions:
- Conduct basic tests to check if each peripheral performs its primary functions. Print a test page with the printer, scan a document with the scanner, and check the display quality of the monitor.
- Verify Connectivity:
- Confirm that the computer recognizes each peripheral. Go to the device manager or system settings to check if all connected devices are listed without any warning symbols.
- Audio and Webcam Testing:
- If you’ve connected audio peripherals or webcams, test them by playing audio or initiating a video call. Confirm that both audio output and video input are functioning as expected.
- Keyboard and Mouse Response:
- Test the responsiveness of your keyboard and mouse. Ensure that key presses register correctly, and mouse movements are smooth and accurate.
Troubleshooting Guide for Common Issues:
- Driver Conflicts:
- Issue: Conflicts between drivers can lead to malfunctions or errors.
- Troubleshooting:
- Check the device manager for any warning symbols next to peripherals.
- Uninstall and reinstall drivers for the affected peripherals.
- Ensure that drivers are up-to-date and compatible with your operating system.
- Connection Problems:
- Issue: Poor or no connection between peripherals and the computer.
- Troubleshooting:
- Confirm that cables are securely connected to the correct ports.
- Test using different cables or ports to rule out physical issues.
- Restart the computer and peripherals to refresh connections.
- Peripheral Not Recognized:
- Issue: The computer doesn’t detect a connected peripheral.
- Troubleshooting:
- Check the device manager for unrecognized devices.
- Reinstall drivers for the unrecognized peripheral.
- Ensure the peripheral is powered on and connected properly.
- Print Quality Issues:
- Issue: Poor print quality or incomplete prints.
- Troubleshooting:
- Check ink or toner levels in the printer.
- Clean printheads or toner drums according to the printer manual.
- Adjust print settings to improve quality.
- Display Issues with Monitor:
- Issue: Flickering, distorted, or no display on the monitor.
- Troubleshooting:
- Check cable connections between the computer and monitor.
- Adjust display settings on the computer for the correct resolution.
- Test the monitor on another computer to rule out hardware issues.
- Scanner Calibration Problems:
- Issue: Inaccurate color reproduction or distorted scans.
- Troubleshooting:
- Revisit the scanner calibration process to ensure accurate color representation.
- Check for updated drivers that may address calibration issues.
- Clean the scanner glass and calibration target.
Additional Tips:
- Documentation Review:
- Refer back to the user manuals for troubleshooting tips specific to each peripheral.
- Online Communities and Support:
- Join online forums or communities related to your peripherals for peer-to-peer support.
- Visit the manufacturer’s support website or contact their customer support for assistance.
By encouraging immediate testing and providing a troubleshooting guide, you empower yourself to address any issues that may arise during the installation process. In the following sections, we’ll explore maintenance tips to keep your peripherals in optimal condition over time.
Maintenance Tips:
Ensuring the longevity and optimal performance of your peripherals requires proactive maintenance. Here are essential tips on how to care for your peripherals, including cleaning procedures, when to update drivers, and how to install computer peripherals:
- Regular Cleaning:
- Key Points:
- Dust and debris can accumulate on peripherals, affecting performance and longevity.
- Use a soft, lint-free cloth to clean surfaces regularly.
- For keyboards and mice, consider using compressed air to remove dust from crevices.
- Refrain from using abrasive chemicals or excessive moisture when cleaning.
- Scheduled Calibration:
- Key Points:
- Calibrate monitors, scanners, and printers periodically to maintain accurate color reproduction.
- Follow manufacturer guidelines or use calibration tools for precise adjustments.
- Regular calibration ensures consistent performance and prevents color discrepancies.
- Driver Updates:
- Key Points:
- Regularly verify for driver updates on the manufacturer’s website.
- New drivers may enhance performance, address bugs, and improve compatibility.
- Update drivers after major system updates or when experiencing issues for optimal functionality.
- Power Management:
- Key Points:
- Turn off peripherals when not in use to conserve energy and extend their lifespan.
- Use power strips or smart plugs to easily disconnect power to multiple peripherals.
- Adjust power settings on the computer to automatically turn off peripherals after a period of inactivity.
- Cable Management:
- Key Points:
- Organize and secure cables to prevent damage and tangling.
- Use cable organizers or clips to keep cables neat and avoid tripping hazards.
- Periodically check for frayed or damaged cables and replace them promptly.
- Firmware Updates:
- Key Points:
- Check for firmware updates for peripherals that support them.
- Firmware updates may introduce new features, improve performance, or address security vulnerabilities.
- Follow manufacturer instructions for updating firmware to avoid errors.
- Proper Ventilation:
- Key Points:
- Ensure that peripherals with built-in fans, such as printers or projectors, have proper ventilation.
- Avoid placing devices in enclosed spaces that may restrict airflow.
- Keep vents and cooling mechanisms free from dust to prevent overheating.
- Monitor Screen Protection:
- Key Points:
- Install screen protectors on monitors to prevent scratches and reduce glare.
- Avoid pressing too hard when cleaning monitor screens to prevent damage.
- Use microfiber cloths for gentle cleaning to maintain display clarity.
- Secure Storage:
- Key Points:
- Store peripherals in a cool, dry place to prevent exposure to extreme temperatures.
- Protect devices from direct sunlight and humidity to avoid damage over time.
- Use original packaging or dedicated storage solutions when peripherals are not in use for extended periods.
- Read User Manuals:
- Key Points:
- Refer to user manuals for specific maintenance guidelines provided by the manufacturer.
- Follow recommended practices outlined in the manuals to ensure proper care.
- User manuals often include troubleshooting tips and solutions for common issues.
By incorporating these maintenance tips into your routine, you’ll extend the lifespan of your peripherals and enjoy consistent, optimal performance. Regular care and attention to these details contribute to a reliable and efficient computing experience. In the final section, we’ll recap the key points discussed throughout the article and offer a conclusion.
Final Thoughts and Recap:
In this comprehensive guide on “How to Install Computer Peripherals,” we’ve covered essential steps to help you seamlessly integrate and maintain various devices with your computer. Let’s recap the key points and offer some final thoughts:
- Introduction to Computer Peripherals:
- Defined computer peripherals as additional devices that enhance computer functionality.
- Emphasized the importance of peripherals in extending the range of tasks a computer can perform.
- Preparation:
- Stressed the importance of reading user manuals for proper installation guidance.
- Highlighted the significance of checking system requirements before purchasing peripherals.
- Gathering Necessary Tools:
- Listed common tools such as screwdrivers, cables, and software CDs.
- Explained the role of each tool and when they are needed during the installation process.
- Creating a Workspace:
- Emphasized the importance of a clean and organized workspace for efficient installation.
- Advised keeping the computer off during the setup for safety reasons.
- Connecting Physical Peripherals:
- Provided step-by-step instructions for connecting peripherals like USB, HDMI, and power cables.
- Stressed the importance of matching cable types to corresponding ports.
- Installing Software Drivers:
- Explained the necessity of drivers for optimal functionality.
- Offered guidance on where to find and how to install drivers, including troubleshooting tips.
- Configuration and Calibration:
- Detailed the process of configuring settings, such as screen resolution for monitors.
- Discussed calibration for peripherals like printers or scanners to ensure accurate performance.
- Testing and Troubleshooting:
- Encouraged users to test peripherals immediately after installation.
- Provided a troubleshooting guide for common issues, including driver conflicts and connection problems.
- Maintenance Tips:
- Shared tips on maintaining peripherals for longevity.
- Discussed cleaning procedures and recommended when to update drivers for optimal performance.
- Final Thoughts:
- Emphasized the importance of regular cleaning, proper calibration, and timely updates for sustained performance.
- Encouraged users to reach out to customer support or online communities for additional assistance and specific troubleshooting.
In conclusion, integrating and maintaining computer peripherals is a rewarding process that enhances the overall functionality of your computer setup. By following the outlined steps and incorporating regular maintenance practices, you’ll ensure a smooth and reliable computing experience. If you encounter challenges, don’t hesitate to seek assistance from customer support or engage with online communities where fellow users may offer valuable insights. Happy computing!
You may also like our other article:
FAQs for Installing Computer Peripherals:
User manuals provide crucial insights into the correct handling, setup, and maintenance of peripherals. Understanding instructions beforehand helps avoid common pitfalls during installation, ensuring a smoother and error-free process.
- Regular cleaning is essential to prevent dust and debris accumulation. Aim for a cleaning routine every few weeks, using soft, lint-free cloths and, when necessary, compressed air for hard-to-reach areas.
Periodically check for driver updates from the manufacturer’s website. It’s advisable to update drivers after major system updates, when experiencing issues, or as part of routine maintenance for optimal functionality.
Check the device manager for unrecognized devices, reinstall drivers for the affected peripheral, ensure proper power and cable connections, and confirm that the peripheral is powered on.
Refer to the troubleshooting guide provided in the article, addressing issues such as driver conflicts, connection problems, and basic testing. Additionally, consider reaching out to customer support or online communities for tailored assistance based on your specific problem.